Replacing batteries

We finished a big job a couple days ago: replacing all 100 batteries in the enormous UPS (Uninterruptible Power Supply) that protects out telescope and camera electronics from short power outages or glitches. Because we use so much electricity (between 50 and 100kW), we need a lot of batteries to run the system when the power goes off, even briefly.

To do this, we have 100 12V batteries that are about two or three times the size of a car battery. They each weigh 57lbs. Five of us spent a day and a half disconnecting and pulling out all 100 of the old, bad batteries, and then installing and reconnecting all 100 of the good, new batteries. What a job!

Thankfully, it worked; when we were done the battery life was much longer, and our system can now stand short power outages.


Our battery-powered UPS. The batteries fill the middle cabinet, which has the sunlight from the window shining on it in this photo.


About 20 of the 100 batteries in that cabinet. Each battery is about 3 feet long and weighs 57lbs! In this picture you can also see the vertical (gold colored) and horizontal (red colored) metal bars that make the electrical connections between the batteries. There’s another set of connections similar to this on the other side of the cabinet. That’s a lot of bolts to undo and then put in again!

Accomodations

I was lucky enough to get a room in the station here, rather than out in “summer camp” where about half the people here are quartered. My room is in the main building, which houses about 150 people and also has the galley, our computer room in the “science” area, the store, and all sorts of recreational facilities.

As you’ll see in the photos below, the rooms aren’t huge, but they are warm and big enough to store all your clothes and personal stuff in. The window shades aren’t quite opaque, so when I want to sleep I put a big piece of cardboard over the window to make it darker inside.


A view of my bed (which is raised up so there is storage space underneath), my desk, and my window. The rope strung across the room is a clothesline; we get to do one load of laundry per week, and drying it in your room both saves electricity and humidifies your room! (It’s very dry here).


A view from the window looking back at the door, closet, and foot of the bed.

The Telescope

Yesterday I finally got the chance to climb up on the telescope, to see the mirror up close. Ostensibly I went up there to brush some snow off before we start doing observing tests, but really I just wanted to see.


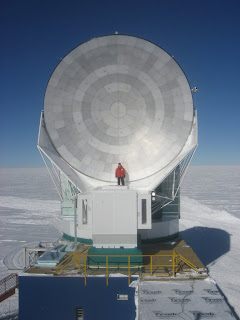
Yep, that’s me in the red coat standing right in front of the 10-meter diameter SPT primary mirror. The mirror is made of many small panels, each about 3feet or so “square”. Each panel was machined from aluminum, using a very precise milling machine (ie, cut with a sharp tool). All the panel surfaces are aligned to within about 40 microns of the desired surface; that’s about the width of a human hair.


A closer view…

Here’s some video of the route up there, filmed by Abby standing on the roof of the “Dark Sector Lab” building right next to the SPT.
Video: climbing up onto SPT

Here’s another video, which I took while up there:
Video: Up On the Telescope

Camera back into the telescope!

Yesterday we hoisted the camera and cold optics back up into the telescope; today we finished putting all the electronics back up there and plugging it all back together (which involved plugging in more than 250 connectors and screwing them together so they won’t come loose). So, the camera is back on the telescope, and we’ll be do observing tests!

Video: using the chain hoists to lift the receiver and secondary optics up into the telescope. This is not as much fun as it looks like. 🙂


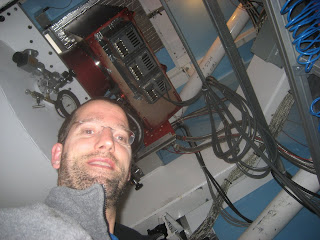
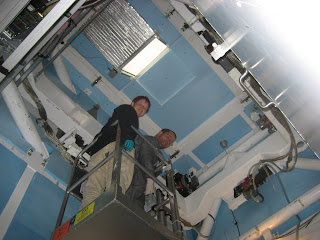
Me, underneath the camera and optics up in the telescope receiver cabin.

Ice Flow

The middle of Antarctica is covered by an enormous ice sheet, two miles thick here at the South Pole. That means that all our buildings are sitting on ice… two miles of ice, before you reach earth and rock below us.

The ice doesn’t just sit there. Here at the pole, it’s flowing slowly (about 30 feet/year) toward the south Atlantic Ocean (40 degrees West longitude… the Weddell Sea). The whole South Pole station goes along for the ride, travelling 30 feet per year over the bottom of the earth.

The pole markers that I showed pictures of in my previous post are only accurate when they’re surveyed (using GPS). One month later, the marker is wrong by almost 3 feet! So, they survey every year and place a new pole marker in the ice on New Years Day; the old pole markers stretch out in a long line, slowly getting buried by the snow as the years pass.

It’s about 1000 miles from here to the ocean; at 30 feet per year, it’ll be 175,000 years before those pole markers – along with anything else we leave here in the snow – falls into the ocean.

Video: the moving pole markers.

The Pole

I’ve been here for about 2 weeks now; it’s funny how easy it is, despite walking back and forth to the telescope several times each day, to forget where you are. Sure, it’s very cold outside, and we have to bundle up for our walk… but we’re here, only yards away from the very axis around which the world turns. Right in the middle of Antarctica, high on the polar plateau, at “the pole”.

Just to prove it (as well as pictures can), here are two photos. The first is me at the “real pole”, the second is a view of our telescope far in the background with the pole marker in the foreground.


Me at the geographic pole. The world is spinning at my feet. I guess I’m spinning too, gotta watch out for dizziness!


The geographic Pole marker, with our telescope far in the background.

The third picture is of me at the “ceremonial pole”, with the barbershop-looking pole and flags from a variety of nations. I think the ceremonial pole is only there for historical reasons; the real geographic pole used to be farther away from the dome, so a ceremonial pole was set up for “daytripper” photo opportunities, so they wouldn’t have to walk all the way from the plane to the real pole. Now, with the new station and the movement of the ice sheet on which we sit over the past few decades (at about 30feet per year), the ceremonial and “real” poles are only a couple hundred feet apart!

But who can argue with tradition? Not me, hence the two photos. 🙂


Me at the ceremonial pole.

Old Dome

For many years, the geodesic dome at the South Pole has been an iconic structure, the image of the place. The dome was built in the 1970’s by Navy Seabees. Unheated and with a snow/ice floor, it provided a windbreak for the small buildings inside it. In all my previous trips, I walked into the dome to go to the Galley for meals three times a day – I slept out in “summer camp”, which is a collection of (upgraded) Korean-war era double-wall half-cylinder tents known as Jamesways. (I really really like the new station – much easier to live in!)

This year, starting tomorrow in fact, they are taking apart the dome and shipping all the material back to the US. Yesterday a group of us walked over there to take pictures; the buildings have been moved out, making it an eerie sight on the inside, but much easier to grasp the scale of the dome. It’s an amazing structure, with lots of history, and it will be sad to see it come down.


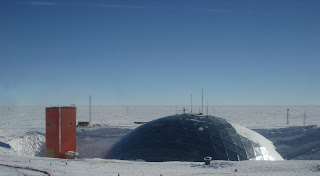
The old dome, viewed from the Galley in the new station. The orange building on the left is Skylab, which used to house a variety of experiments doing things such as looking at the aurora. The dome had about 4 or 5 similar-looking buildings (square, orange) in it. The dome is now empty (see next photo), and Skylab is coming down soon.


A picture of the inside of the dome, now empty, ready to come down.


A picture of a torn panel, showing how thin the aluminum sheet is; Until I saw this, for some reason I always imagined that the aluminum triangles were much thicker!

Video: Old Dome, walking in.
Video: Old Dome, from inside.

The Galley

Happy Thanksgiving (a little belated) to everyone!

Down here, we celebrate Thanksgiving on Saturday (today) rather than Thursday, so that the support folks can have a 2-day weekend. They normally work Mondays through Saturdays, and have Sundays off. So, tonight is the special holiday dinner in the Galley.

I haven’t posted any pictures of the Galley in normal times, so here’s a movie of showing what it looks like at a normal dinnertime. It has great windows looking outside, and enough seating that despite the fact that we have 250 people on station it is rarely very crowded. We’ve had good food here this year, with a surprising amount of fresh fruit and greens, which have at least a 2 day travel time from New Zealand to here (in the best of weather)!

Video: The Galley at Dinnertime
A quick tour of the dining room, known as the “galley”.

Grease is the Word

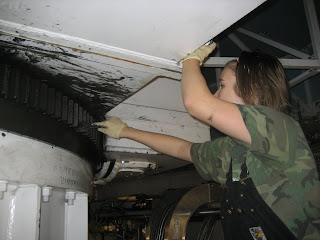
Today, with all the electronics working and the camera cooling, we got dirty. A telescope as big as the SPT requires a lot of grease… in the bearings, on the gears, all the moving parts.

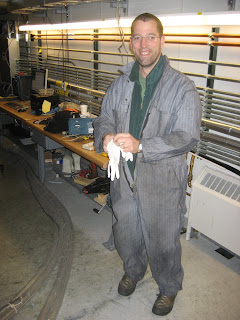
We donned our greasy clothes (I was lucky enough to have gotten some coveralls from the heavy machine shop here), and went to work.


Here I am, all dressed up in coveralls, ready to get dirty.

Video: Getting ready for Grease Day!


Abby paints grease onto the azimuth gear…

Video: Abby greases the Azimuth gear.


Liz and I head up to the place where the receiver sits, where a bunch of motors can move it around to focus the telescope; those motors need greasing once per year. It’s a 2 person job because it’s so hard to get to the grease points!

Tales of woe

It’s been a few day since I wrote here… largely due to two tales of woe.

First and foremost, my laptop is dying. The charger no longer charges it, the battery is almost empty, and after googling and talking to folks in IT here and talking to apple, there’s no way to fix it without giving it back to Apple to have them work on it. So, I’m laptopless for the next 2 weeks. I’ve taken over a linux workstation (with two big screens, so at least it’s an upgrade in that sense), and have figured out how to download pictures from my camera, but it’s not iphone compatible.

Having your laptop break brings home the fact that when you’re here, when something breaks you either have to fix it yourself, go without, or wait a looonnnnnng time for a replacement to come in.

Which brings us to the other tale of woe: the electronics that read out temperatures inside the big optics cryostat stopped working when we brought them down from the telescope to the control room so they’d be next to the cryostat, since that’s where we’re testing everything. The first indication was that the computer wasn’t getting any of the data it should; we quickly realized that the problem was probably with one of the timing signals sent from a “timing box” over some wires to the temperature-reading electronics box.

We have lots of custom-designed and built electronics here, to read out the signals from our detectors, temperatures of the cryostats, control the telescope, etc etc. Since we know those things can break and we’re a long way from Radio Shack, we stock a lot of extra components and parts here. A good part of making an experiment like ours work is in fixing all the problems that crop up; so this broken electronics box, while annoying, was just another hurdle to get over.

Ken Aird (another SPTer, from Chicago) and I spent a couple hours on Tuesday, then 5 more hours on Wednesday, tracing down the problem. We thought it was in the temperature-reading box, and pulled out a circuit board and replaced a tiny integrated circuit in there… but that didn’t change the behaviour at all. Looking at the signals more closely, we decided the signals coming from the timing box were a bit suspicious looking and decided to swap out the integrated circuit that sends those signals… and voir la, it worked!

Just in time for dinner, in fact. 🙂

So, down a laptop but having fixed the electronics yesterday, a new day begins. The camera cooldown is going well, and we should be able to start testing detectors on Sunday.
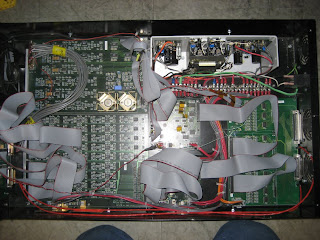

The optics temperature-readout box, which we thought was the source of our troubles…
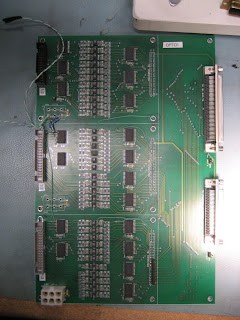

The board we pulled out of that box; Ken replaced one of the small 8 pin chips on there, using a soldering iron under a microscope to do so.


The actual source of our problems was an easy-to-replace chip in this, the timing box. Sometimes it takes a long day to find the easy solution.